
Smart Dustbin using Arduino and Ultrasonic Sensor
Component Requirement for Arduino Based Dustbin
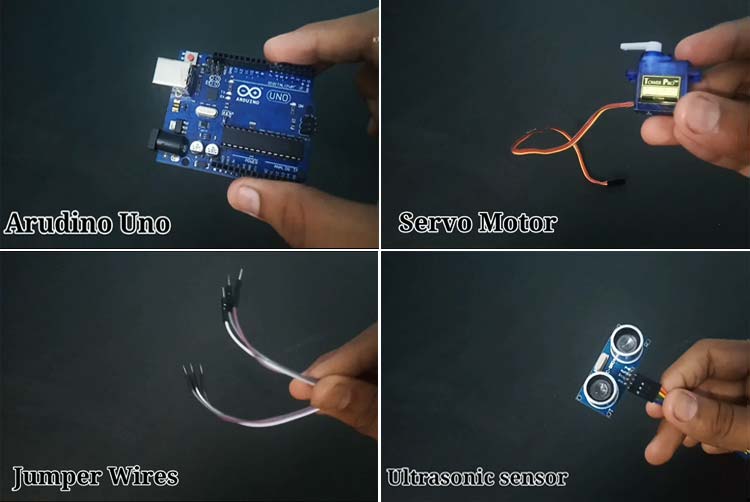
The following are the components required to build a smart dustbin using Arduino.
Project Used Hardware
-
Arduino UNO,
-
Jumper Wires,
-
Servo Motor,
-
Ultrasonic Sensor
Project Used Software
-
Arduino IDE
Project Hardware Software Selection
Arduino UNO: As you know that Arduino is a microcontroller-based open source electronic prototyping board that can be programmed with an easy-to-use Arduino IDE. The UNO is one of the most popular boards in Arduino family and a great choice for beginners.
Ultrasonic Sensor: These are the sensor that use ultrasonic waves to detect objects or to measure the distance between themselves and the object
Servo Motor: This is an electrical device that can push or pull and also rotate an object with great precision. if you want to rotate an object at some specific angles or distance, then you use servo motor. It is made up of a simple motor that runs through a servo mechanism. We can get a very high torque servo motor in a small and light weight packages.
Block Diagram
The working of this Arduino smart dustbin is very simple. The ultrasonic sensor acts as the input and the servo motor acts as the output, the Arduino UNO microcontroller is the main brain behind the project. The block diagram for Arduino smart dustbin is shown below

As shown in the block diagram, the Arduino microcontroller constantly monitors the values from the ultrasonic sensor which is placed outside the dustbin. When a person comes near the dustbin the values from the sensor change, this change is noticed by the microcontroller, and it then turns the servo motor to open the dustbin. After some time the controller turns the servo again in the opposite direction to close the dustbin, then the whole process is reapted again.
Circuit Diagram
The image below shows the Arduino circuit diagram for building a smart bin. As you can see it is very simple, it just has an ultrasonic sensor and a servo motor connected to the Arduino UNO, and the whole setup is powered by a 9V battery.

You can make the connections as shown in the circuit diagram, if you have any doubts you can also follow the connection diagram below
| Component | Pin | Arduino Connection |
| Servo Motor | Yellow Wire | Digital Pin 7 |
| Servo Motor | Red Wire | 5V |
| Servo Motor | Black Wire | GND |
| Ultrasonic Sensor | VCC pin | 5V |
| Ultrasonic Sensor | GND pin | GND |
| Ultrasonic Sensor | Trig pin | Digital Pin 5 |
| Ultrasonic Sensor | Echo pin | Digital Pin 6 |
| 9V Battery | Positive | Vin |
| 9V Battery | Negative | GND |
Smart Dustbin Arduino Code Explanation
The code for the Arduino Smart Dustbin is very simple and straightforward. The complete code for this project can be found at the bottom of this page. But now let’s break the code into small segments to understand how the code works. Starting with library and variable declaration
#include <Servo.h>   //servo library
Servo servo;
int trigPin = 5;
int echoPin = 6;
int servoPin = 7;
int led= 10;
long duration, dist, average;
long aver[3];   //array for average
We have used the Servo.h library to control the servo motor using Arduino. This library is already pre-installed in Arduino and is very easy to use. If you are completely new to servo motors and Arduino, you can read our article on how to use servo motor with Arduino. Next, we have mentioned to which pins our ultrasonic sensor and servo motor is connected to, in this case trigger pin is connected to pin5, echo pin is connected to pin 6 and servo signal pin is connected to pin 7 of Arduino UNO.
void setup() {
   Serial.begin(9600);
   servo.attach(servoPin);
   pinMode(trigPin, OUTPUT);
   pinMode(echoPin, INPUT);
   servo.write(0);         //close cap on power on
   delay(100);
   servo.detach();
}
Inside the void setup function, we start the serial monitor at 9600 baud rate which will be useful for debugging. And then initialize the servo motor and declare trigger pin as output pin and echo pin as input pin. We are also moving the servo motor position to 0, to make sure the dustbin is closed during power on.
void measure() {
digitalWrite(10,HIGH);
digitalWrite(trigPin, LOW);
delayMicroseconds(5);
digitalWrite(trigPin, HIGH);
delayMicroseconds(15);
digitalWrite(trigPin, LOW);
pinMode(echoPin, INPUT);
duration = pulseIn(echoPin, HIGH);
dist = (duration/2) / 29.1;    //obtain distance
}
The above function called measure(), is used to measure the distance between an the dustbin and the object in front of it. First we turn on the trig pin and wait for 15 microseconds and then turn it off, this will send the ultrasonic waves out of this sensor which will get deflected back to the sensor after hitting on the object in front. We will read these ultrasonic waves again using the sensor by using the echo pin as input. Then calculate the duration and distance using the above formulae. If you can also read how to use ultrasonic sensors with Arduino if you are completely new to ultrasonic sensors.
void loop() {
 for (int i=0;i<=2;i++) {   //average distance
   measure();
  aver[i]=dist;
   delay(10);              //delay between measurements
 }
dist=(aver[0]+aver[1]+aver[2])/3;
if ( dist<50 ) {
//Change distance as per your need
servo.attach(servoPin);
 delay(1);
servo.write(0);
delay(3000);
servo.write(150);
delay(1000);
servo.detach();
}
Serial.print(dist);
}
Inside the void loop function, we will implement the main logic of our arduino smart dustbin project. First we use a for loop to measure the distance between the sensor and the object using the measure function we discussed earlier, this is done three times and all the results are stored in an array called aver. We then take the average of all three values to calculate the distance. If this measured distance is less than 50 we will open the dustbin by controlling the servo motor. After opening we will wait for 3 seconds and then close the dustbin automatically using the servo motor again. In the code the servo position 0 is used to open the dustbin and position 150 is used to close the dustbin.
Other Smart Dustbin Projects
Now that you have learnt how to build a simple smart dustbin project using Arduino UNO, you can checkout the below smart dustbin projects which you can use to enhance your project and add more features. All projects have clear circuit diagram and code for anyone to easily rebuild.