
Arduino Wave Audio Player with SD Card
Arduino Wave Audio Player with SD Card
This article shows how to easily play wave audio files (files with .WAV extension) using Arduino UNO board. The Arduino loads wave audio files from FAT16 or FAT32 formatted SD card and a simple PC speaker is used to amplify the audio signal generated by the Arduino microcontroller.
Wave audio file is a Microsoft and IBM audio file format standard for storing an audio bitstream on PCs. The good thing with this format is that it is not compressed, this allows even a small microcontroller to play it.
Usually a DAC (Digital-to-Analog Converter) is used to generate sound. The Arduino UNO microcontroller (ATmega328P) doesn’t have a DAC module, therefor PWM (Pulse Width Modulation) is used instead of DAC. A higher PWM frequency should give better sound output.
The sound is generated by varying the duty cycle of the PWM signal.
For better results, the wave audio file should have the following characteristics:
Format : PCM
Format settings : Unsigned
Sampling rate: 16.0kHz
Bit depth: 8 bits
Number of channels: mono (1 channel)
If we have a MP3 audio file we can convert it to a .wav format using a software named: Audacity. It’s a free and open source converter.
Audacity official website: https://www.audacityteam.org/
How to convert MP3 file to WAV file:
This example shows how to convert MP3 into WAV using Audacity converter.
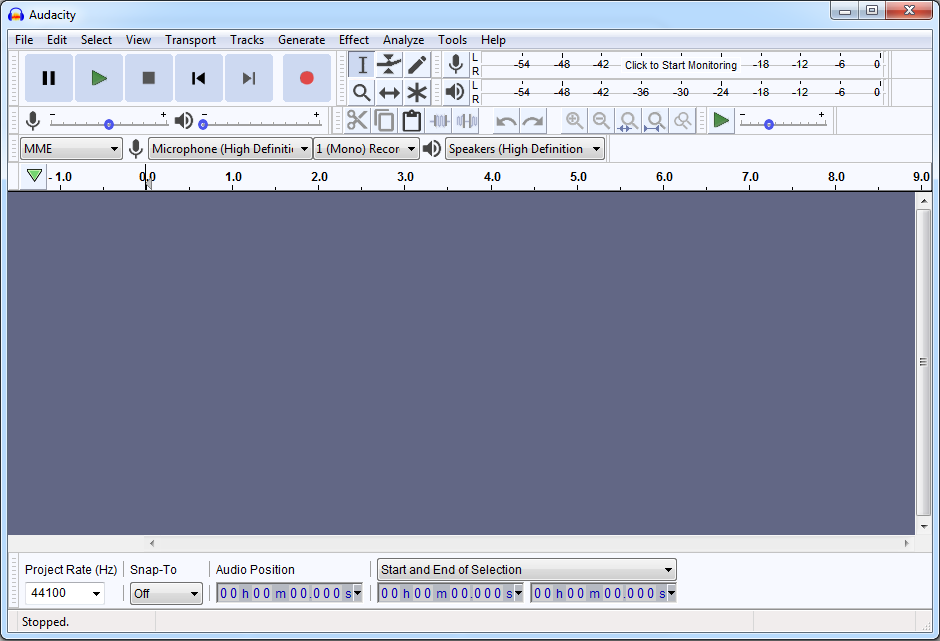
First, open Audacity software, a window will open as shown below:
Go to: File —> Open… and open the MP3 file.
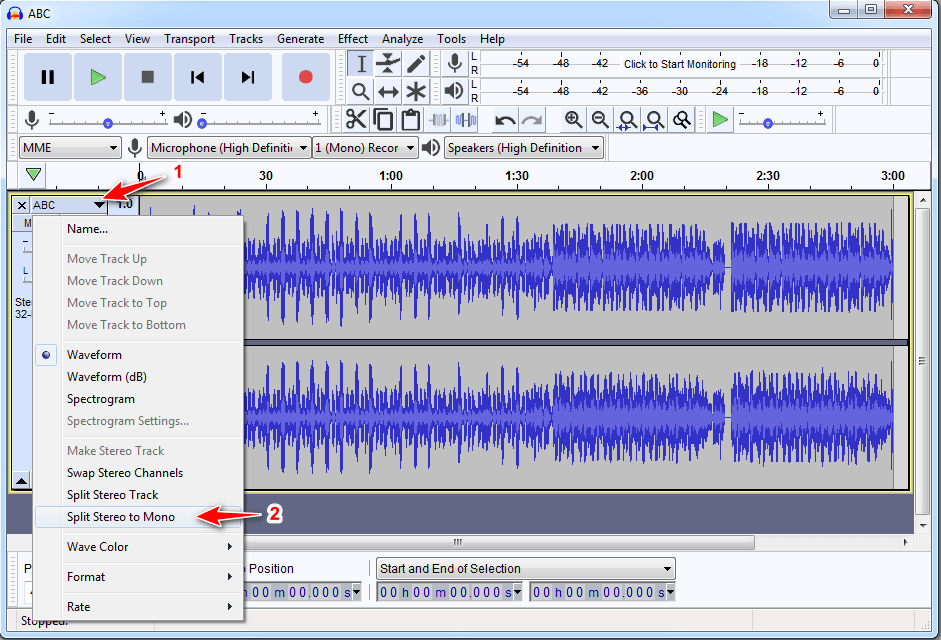
Click on the file name then on Split Stereo to Mono as shown below:
Now click on X and change the sampling rate to 16000:

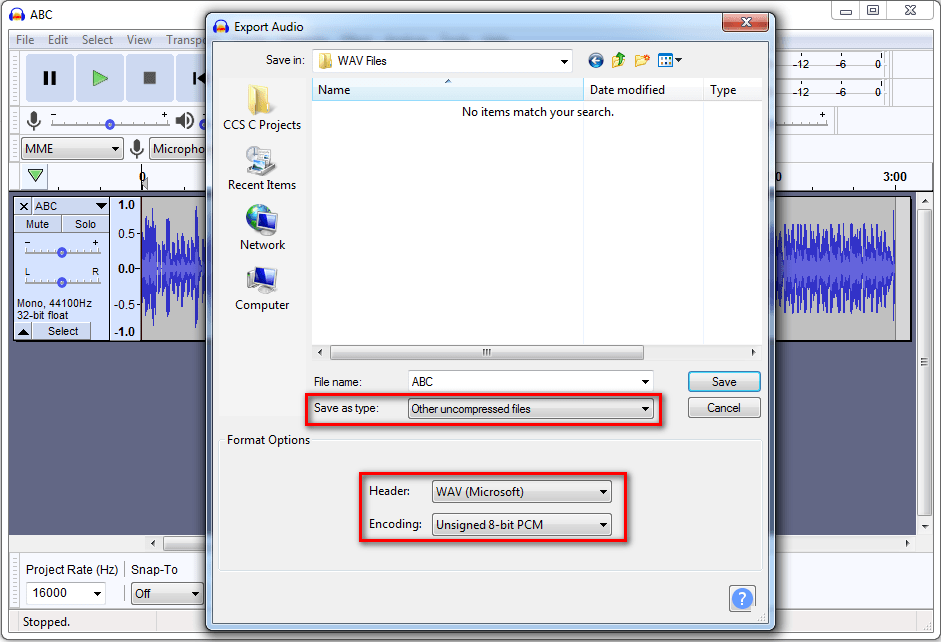
After that, go to File —> Export —> Export as WAV, a new window will open.
Change Save as type to Other uncompressed files and save your wave file.
And you’ll get your file with WAV format!
Hardware Required:
- Arduino UNO R3, or similar board —> Board details —> ATmega328P datasheet
- microSD card with FAT16 or FAT32 file system
- microSD card module adapter
- Audio amplifier (ex: PC speaker, LM386 …)
- Speaker
- 1k ohm resistor
- 2 x Push button
- 10uF capacitor
- Breadboard
- Jumper wires
Arduino Wave Audio Player with SD Card Circuit:
The following image shows project circuit diagram.

Arduino digital pin 9 is the audio output (PWM signal), it’s connected to the audio amplifier.
Audio amplifier ground must be connected to Arduino ground (any GND pin).
In this project I used microSD card module, this module is supplied from circuit 5V source that comes from the Arduino UNO board. This module contains AMS1117-3V3 voltage regulator which is used to supply the micro SD card with 3.3V. Also this module contains an IC which is 74LVC125A and it’s used as level translator (from 5V to 3.3V).
The microSD card module is connected to the Arduino as follows (from left to right):
The first pin of the micro SD card module (GND) is connected to Arduino GND,
The second pin of the micro SD card module (VCC) is connected to Arduino 5V,
The third pin of the micro SD card module (MISO) is connected to Arduino digital pin 12,
The fourth pin of the micro SD card module (MOSI) is connected to Arduino digital pin 11,
The fifth pin of the micro SD card module (SCK) is connected to Arduino digital pin 13,
The last pin of the micro SD card module (CS) is connected to Arduino digital pin 10.
The digital pins 10, 11, 12 and 13 are hardware SPI module pins of ATmega328P microcontroller (Arduino UNO microcontroller).
Arduino Wave Audio Player with SD Card Code:
The following Arduino code requires TMRpcm library which allows us to easily play wave files from SD card. This library can be installed from Arduino IDE library manager (Sketch —> Include Library —> Manage Libraries …, in the search box write “tmrpcm” and click on Install).
Or it can be installed manually, first download the TMRpcm library from the following link:
TMRpcm Library —> direct link
After the download, go to Arduino IDE —> Sketch —> Include Library —> Add .ZIP Library … and browse for the .zip file (previously downloaded).
Hints:
There is no need to specify wave audio file names, the Arduino will search and play all the wave audio files located in the main root of the SD card.
When the ‘Next’ button is pressed, the Arduino will play the next wave file.
There are 3 libraries included in the main code as shown below.
Including Arduino SPI library is optional!
|
1
2
3
|
#include <SPI.h> // include Arduino SPI library
#include <SD.h> // include Arduino SD library
#include “TMRpcm.h” // include TMRpcm library
|
Rest of code is described through comments.
Full Arduino code:
|
1
2
3
4
5
6
7
8
9
10
11
12
13
14
15
16
17
18
19
20
21
22
23
24
25
26
27
28
29
30
31
32
33
34
35
36
37
38
39
40
41
42
43
44
45
46
47
48
49
50
51
52
53
54
55
56
57
58
59
60
61
62
63
64
65
66
67
68
69
70
71
72
73
74
75
76
77
78
79
80
81
82
83
84
85
86
87
88
89
90
91
92
93
94
95
96
97
98
99
100
101
102
103
104
105
106
107
108
109
110
111
112
113
114
115
116
117
118
119
120
121
122
123
124
|
/*
* Play wave audio files with Arduino.
* This is a free software with NO WARRANTY.
* https://simple-circuit.com/
*/
#include <SPI.h> // include Arduino SPI library
#include <SD.h> // include Arduino SD library
#include “TMRpcm.h” // include TMRpcm library
#define next 2
#define _pause 3
TMRpcm audio;
File root;
void setup(void) {
Serial.begin(9600);
pinMode(next, INPUT_PULLUP);
pinMode(_pause, INPUT_PULLUP);
Serial.print(“Initializing SD card…”);
if (!SD.begin()) {
Serial.println(“failed!”);
while(true); // stay here.
}
Serial.println(“OK!”);
audio.speakerPin = 9; // set speaker output to pin 9
root = SD.open(“/”); // open SD card main root
printDirectory(root, 0); // print all files names and sizes
audio.setVolume(5); // 0 to 7. Set volume level
audio.quality(1); // Set 1 for 2x oversampling Set 0 for normal
}
// main loop
void loop() {
if ( !audio.isPlaying() ) {
// no audio file is playing
File entry = root.openNextFile(); // open next file
if (! entry) {
// no more files
root.rewindDirectory(); // go to start of the folder
return;
}
uint8_t nameSize = String(entry.name()).length(); // get file name size
String str1 = String(entry.name()).substring( nameSize – 4 ); // save the last 4 characters (file extension)
if ( str1.equalsIgnoreCase(“.wav”) ) {
// the opened file has ‘.wav’ extension
audio.play( entry.name() ); // play the audio file
Serial.print(“Playing file: “);
Serial.println( entry.name() );
}
else {
// not ‘.wav’ format file
entry.close();
return;
}
while( debounce(next) ) ; // wait until ‘next’ button is released
}
if ( !digitalRead(next) ) {
// ‘next’ button is pressed
audio.stopPlayback(); // stop playing
return;
}
if ( !digitalRead(_pause) ) {
// ‘_pause’ button is pressed
audio.pause(); // pauses/unpauses playback
while( debounce(_pause) ) ; // wait until ‘_pause’ button is released
}
}
// a small function for buttons debounce
bool debounce (int bt)
{
byte count = 0;
for(byte i = 0; i < 5; i++)
{
if ( !digitalRead(bt) )
count++;
delay(10);
}
if(count > 2) return 1;
else return 0;
}
void printDirectory(File dir, int numTabs) {
while (true) {
File entry = dir.openNextFile();
if (! entry) {
// no more files
break;
}
for (uint8_t i = 0; i < numTabs; i++) {
Serial.print(‘\t’);
}
Serial.print(entry.name());
if (entry.isDirectory()) {
Serial.println(“/”);
printDirectory(entry, numTabs + 1);
} else {
// files have sizes, directories do not
Serial.print(“\t\t”);
Serial.println(entry.size(), DEC);
}
entry.close();
}
}
// end of code.
|
Arduino Wave Audio Player with SD Card Video:
The following video shows test circuit of Arduino wave audio player with SD card.